
When you install a new kitchen or remodel your old one you will need to know how to scribe your cabinets properly and when, why, where to use it.
The objective is to only scribe what needs it to keep that mold design at a minimal use so it does not interfere with your kitchen design.
Cabinet installation how to scribe
There are lots of different types of cabinet so lets make a list of them and go down one by one on all all the possible and most places you will scribe each cabinet.
How to Scribe Base Cabinets
When it comes to your base cabinets it is a standard measurement that your cabinet will be 34.5 inches tall from the floor to top of cabinet and then you will have a space that dives in about 3.4 to 4 inches on bottom for toe kick area so this means that right above the toe kick area your cabinet face frame will begin and end at the top so it should measure just about 30.5 inches.
The purpose of scribe is too cover any imperfections and to close any tiny visible seams that may run along the sides of the cabinet as it butts up and joins against your kitchen wall. So you will scribe the back part of the cabinet which is 34.5 inches tall only if its the end of your cabinet run, meaning if you have 6 base cabinets installed side by side then you will only scribe the far left cabinet where it meets the wall and the far right cabinet where it meets the wall as well.
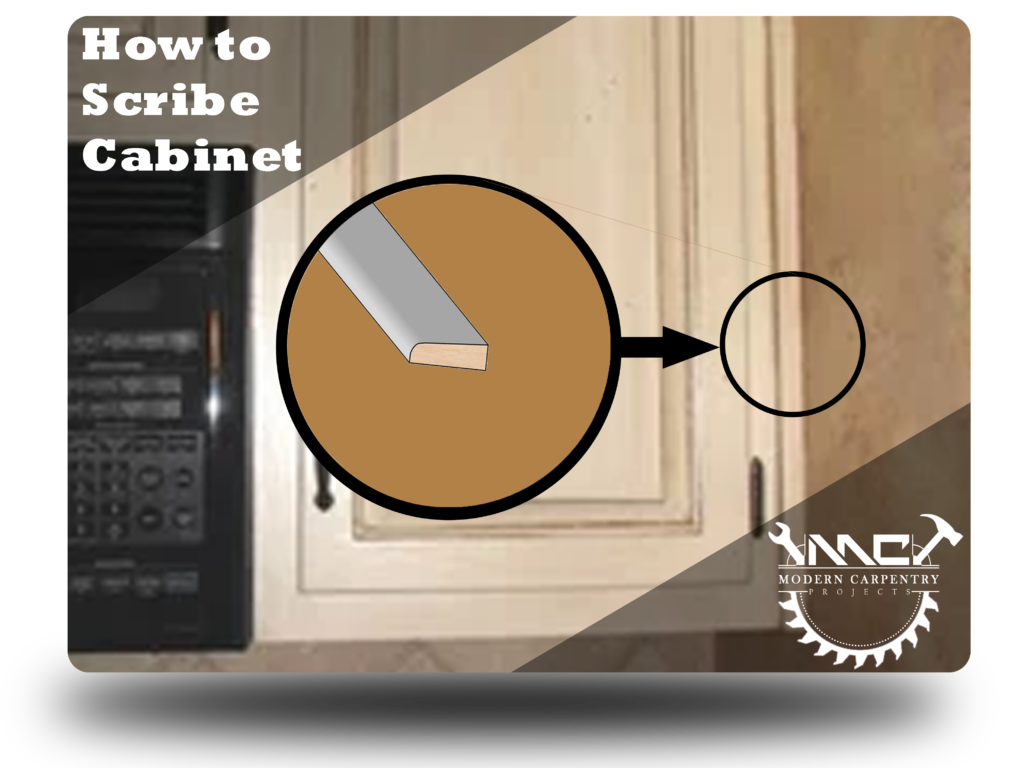
Scribe has 2 sides a flat side and curved in or beveled side, make sure your flat side is always against the wall and the curved side pointing towards the cabinet.
So if you cabinet face frame is what is next to the wall then you will add a 30.5 inch scribe on that part making sure you push it against the wall and the cabinet side while maintaining the tops and bottoms flush with cabinet.
How to Scribe Wall Cabinets
Now that it comes to wall cabinets you must make sure that the scribe molding is the last molding you add. First make sure your crown and light rail molding is already installed in place.
Once you are ready to scribe the wall cabinet just make sure to scribe the wall cabinets that are on both ends of the row of cabinets across your wall and in any opening in between that will have exposed wall cabinet sides.
Similar like the base cabinets you will place the scribe with flat side against the wall and the beveled side pointing towards the cabinet itself. The top of scribe should be touching the bottom of crown and the top of light rail. If you have no light rail then just run the scribe to bottom of cabinet.
How to Scribe Large Utility Cabinets
If you have a large utility storage cabinet or an oven cabinet be aware that you may have to add scribe to cover any imperfections or joints if your cabinets are composed of 2 or more pieces.
Most commonly you will add the scribe only if the cabinet is against the wall. Some large cabinets like oven cabinets or microwave cabinets may require cut out so if the visual is not the best you could always use this scribe molding to cover any imperfections.
How to Scribe Hood range Cabinet
The hood range cabinet is most often composed of several pieces put together. Not all pieces always come together perfectly as the should so if your parts are an odd shape or you wall, ceiling, or adjacent cabinets are not 100% straight then fear no more this scribe molding will cover any of those imperfections and make your hood range cabinet look like a solid piece that came with your kitchen. Place the scribe in every spot 2 pieces of individual wood structures are put together for proper seam covering.
How to Scribe Island Cabinet
The island cabinets can be a bit difficult but only because you will use a combination of molds and you want to make sure you use the correct one where needed. Because the scribe is flat you will only use it if the island meets the wall like a peninsula or if your island is composed of several different parts like back panels, multiple cabinets or other add on parts.
How to scribe a filler panel for cabinet installation?
To scribe a filler panel you will need to place the scribe where your filler panels join to cover the seam if you have more than one panel. But if you only have one filler panel only scribe the side that is touching or side of wall.
If you have filler panels that turn at a corner with exposed ends then a scribe will not cover that seam properly, you will need a different kind of mold called a corner bead or mold.
What is scribing spacers in cabinet installation?
Scribing spacers can sometimes be mistaken as cabinet fillers that cover any space or gap between a cabinet and a cabinets or a at the point between a cabinet and a wall.
If you are referring to the scribe mold itself then it is a 3/4 inch wide by 1/4 inch thick stock mold with a curved side and flat side, the entire stick of mold can be up to 92 inches long and can be cut down to needed lengths for cabinet spots that touch the wall at the end of the row of cabinets.
How to use scroibe molding on kitchen cabinet installation?
The “scroibe molding on kitchen cabinets” is sometimes misspelled as so but the correct term is “scribe molding on kitchen cabinet”. It is a thin piece of stock wood with a curved and flat profile that you can install on the exposed cabinet sides that touch the wall to cover any imperfect or crooked gaps or seams.
How to hide cabinet installation mistakes?
Not everyone is perfect so you may need to fix and hide a cabinet installation mistake that was made during time of install or perhaps something was damaged on delivery. You can easily cover any cracked or scratched edges that do not exceed 3/4 inches with a scribe molding. The scribe molding is color matched and looks great no matter where you place it as long you keep the design congruent across the kitchen install. If you place one scribe on a cabinet either going horizonal or vertical then do the same to the cabinet mirroring that cabinet or across sight view of it.
Sometimes you may miss drill or want to cover a dent or minor paint crack with out replacing the entire cabinet unit, so a scribe molding is perfect for the job. Wood is very forgiving and with a little bit of skill you can match the talent it took to build that cabinet at the shop with your own tools and supplies and even exceed expectations by going above and beyond by reinforcing any cabinet with either using corner triangles for added strength or brackets.
Conclusion
Not everyone is a Pro but always remember a little advice goes a long way. Sometimes you just have to point someone in the right direction and the rest will make more sense in their unique situation as they continue walking it one step a time.
It was a delight having you here and good luck in your future adventures.


