What is the purpose of a kitchen island makeover?
To begin we must establish what defines a kitchen island. The kitchen island is unit made up of several different components. The cabinetry involved are normally cabinets installed in a row form, “U” form, or “L” form of your choice. Then a solid piece of countertop is placed above all the cabinets and trim work to make the unit appear as one large singular piece.
They are very popular in open kitchens and in homes with a large kitchen layout. Kitchen islands improve the functionality and visual appearance of your entire kitchen. You have the choice of placing either a sink, stove, or appliance on the island if desired.
How is a kitchen island installed?
The key to a solid island installation is to add proper anchor points at the corners along with the front and back sides of the cabinets for support. You can add anchor points by cutting a 2×4 to the size of the inner bottom of your cabinets and positioning them to a desired distance from surrounding base cabinets, then you will either pre-drill some pilot holes into the concrete with a hammer drill and then add tap cons or you can simply ramset them into place with one maneuver.
Most cabinets are left unfinished from the outer back wall because they are normally placed against your house wall. This gives you the opportunity to screw in the island from the back side and front bottom part where the toe kick will cover and with a finished panel places on the back side. Make sure you are level from left to right and front to back because this is where your countertop will be sitting.
Ship Lap Island Makeover
A very popular natural wood look that is achieved by installing several long boards together side by side. They are also referred to as tongue and grove planks, Ship Lap, and Paneling. It is normal for the joints to have some sort of beveled edge or evenly spaced out reveals at every joint to make it look uniform and to keep that ship lap appearance.
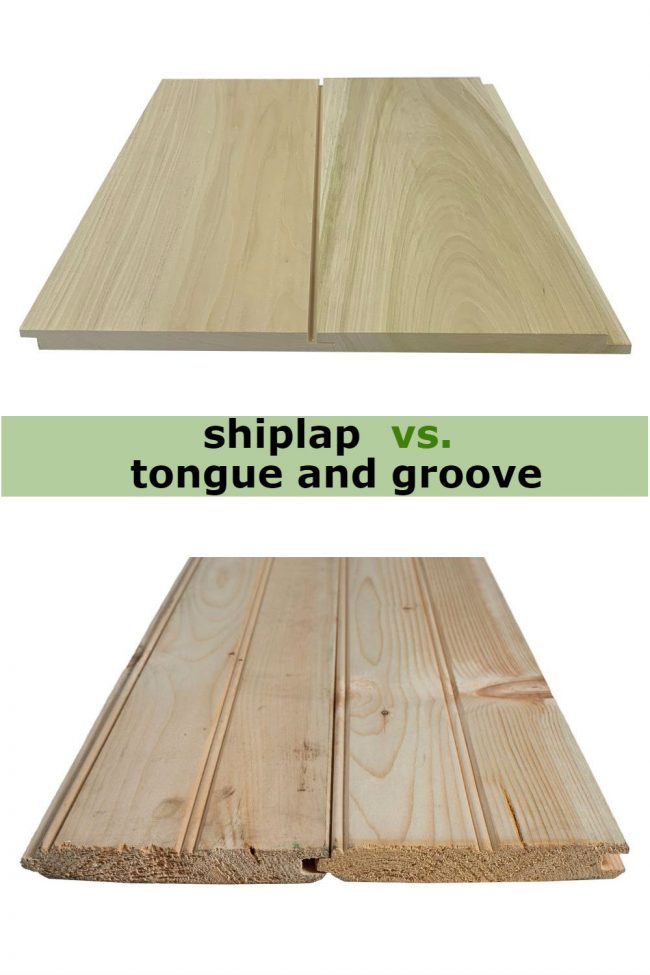
What are the differences between ship lap versus tongue and groove?
Basically they operate differently and offer very similar results. The ship lap planks overlap each other as the beginning plank has an extended connecter piece only a quarter of the total thickness of the board which is then overlapped by the next plank that goes next to it so underneath the bottom part there is a void that is a quarter of the total thickness. So as the ship lap is connected there is intentionally a long slim reveal left between each plank on the joint sides.
The tongue and groove planks already come with a design that is routed on the planks on the center and on one of the joint sides that will be next to the following piece. The exerted connector piece is on the center this time so it will be sandwiched by the void in the next plank.
Which is cheaper ship lap or tongue and groove?
Depends on how big your project and is what kind of wood or finish you want your planks to be. If you go with natural unfinished wood planks for tongue and groove you can get a 16 foot board for just about $18/each versus the ship lap plank in a 16 foot board for just about $20/ each. So the price difference isn’t that big it just depends on what style you like best. Of course if you want pre painted ,sealed, and finished planks your price by piece will multiply in parallel with the quality of your choice.
How do I start ship lap?
To start ship lap on the back of the kitchen island cabinets you will need to begin from the bottom. Remove the shoe mold that is currently surrounding your island. Now see if you can see the bottom edges of the island cabinets. If you see that they are in shimmed up then begin your first plank at the same height and make sure you are level. Now make sure your nails you will be using do not go into your island cabinets or consider using an additional backboard just to make the back panel thicker for easier install.
As you continue installing the planks keep adding glue in the tongues and behind the planks. Keep checking for level and realize that all boards are not equally and humidity has a lot do with it so your planks may differ by 1/16th of an inch every now and then so cheat it a little to keep your boards level as you continue. Because if you don’t correct the miss level it will only get worse and become more visible. Finally add corner trim on the exterior sides to cover unfinished plank edges, and lastly reattach the shoe mold.

Farmhouse Island
Makeover
The farmhouse kitchen makeover is trending a lot in new construction and old home remodels. This old design has been brought back to life with modern aspects that compliment the farmhouse look very well. When we think farmhouse you must always know it is more of a squared boarded look with the boxed in panels.
How to makeover an island into a farmhouse style?
The barn door is a big inspiration on this style so for an island makeover you can add stock boards that intersect each other in a perpendicular manner at a diagonal angle so that the crossing boards create triangles inside the boxed in panels. The angles of these crossing boards will always change depending on how tall or long your target panel is. Only add shoe mold if you have exposed or unfinished flooring showing.
Modern Island Makeover
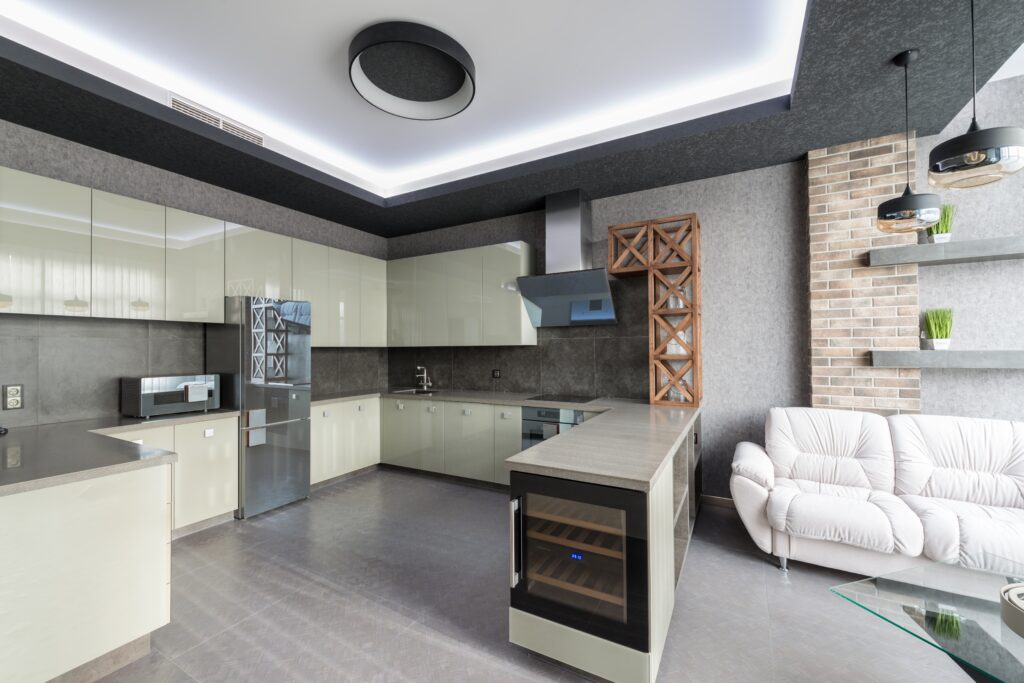
You can make lots of changes to your kitchen island to make it look like a modern style island. To start with the low ticket items consider adding bar stools along one side of the island. Try painting it a more neutral color to keep things simple and for smooth operation.
How to upgrade into a modern island makeover?
The modern kitchen islands that are trending now are the waterfall countertops that follow down on both ending panels of the edge cabinets. It really makes it seem like the island is solid piece of squared stone sitting in your kitchen. You can do this with marble, granite, quartz, and Corian countertops. Some even include long extended patterns that flow from one side of the island to the other, these are truly art pieces.
Bead board Island Makeover
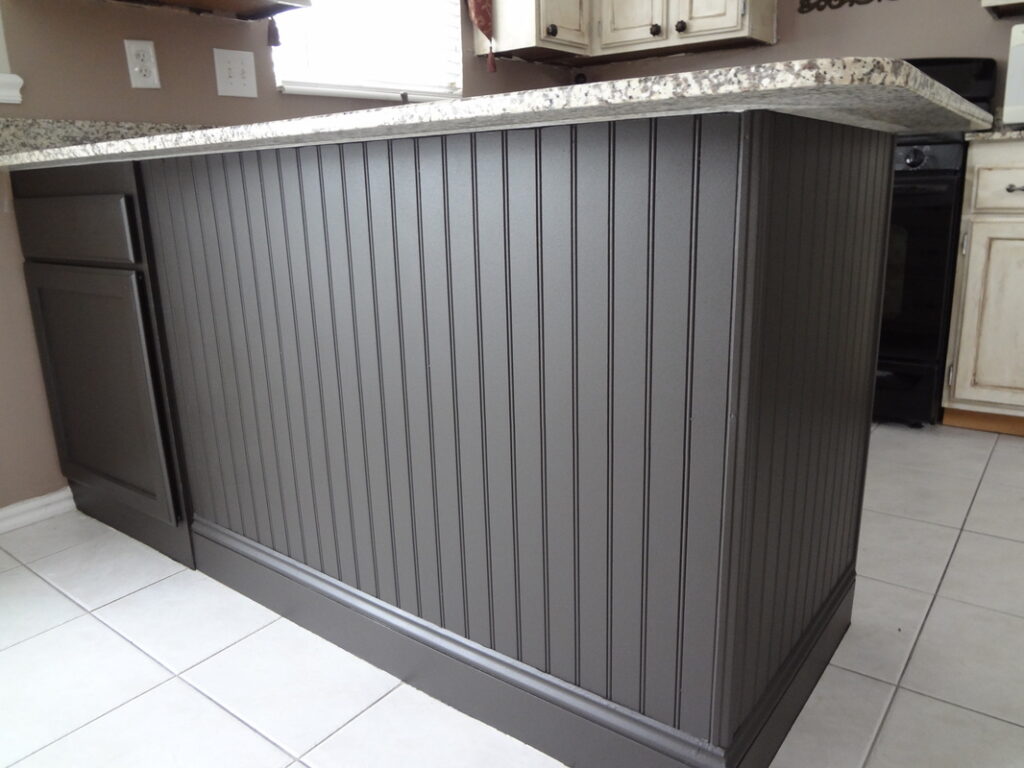
The easiest and more affordable is just to purchase a 4 by 8 feet Bead Board that you can cut down to fit the back of your island. You can decide to keep the pattern of lines of bead board runnig horizontal or vertical, depending on your liking. A good install tip is to use a good quality construction glue and to nail on the grooved parts of your bead board so you can fill in the nail hole in the gaps and it will leave your flat sides perfectly smooth.
Stone Island Makeover
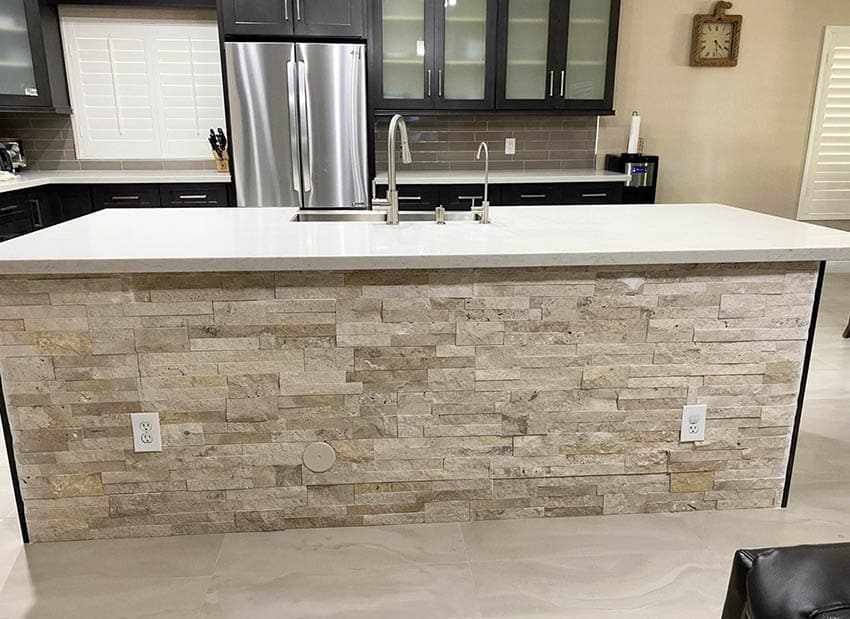
Have you ever noticed that beautiful stone on the exterior of homes and the interior of chimney decorations and how nice they look. Well that are filled with intricate patterns and different shades of neutral colored stones in a large amount of weird shapes and sizes. Now you can add them to your kitchen island makeover.
How can I add stone to my kitchen island?
When deciding to add stone into the interior of your home then there will be more options because the outside elements will no longer be an obstacle. So if you want to save money but still want to have that natural stone look on your island then the Faux Panels will be a great addition to your kitchen. They look and feel like the real thing, because they are textured and colored just like real stone so just pick out your gradient of stone and go for it. They are large sheets of panels that interlock so it just require them to be cut down to fit your kitchen island.
The authentic stone types are the following:
- limestone
- granite
- marble
- slate
- travertine
These stones will last a lifetime and depending on what features you are more attracted to then having a few samples of each in front of you will help you decide what qualities fit your needs.
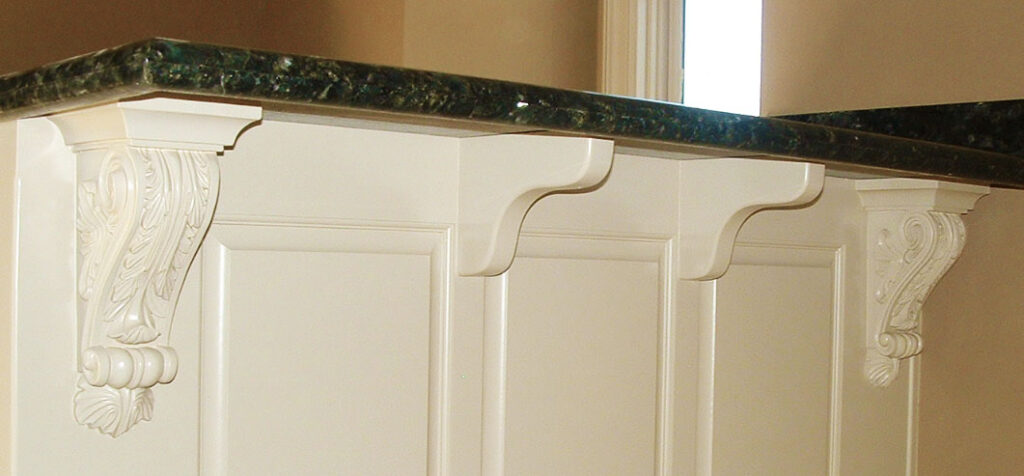
A fancy island is only complete if you add some corbels on the back of the island where your island should be overhanging past the end of the cabinets. An elegant touch is a well placed corbel in the centers or corners of your island. Some are very simple and slim in design but the most lucrative corbels are hand carved or now even made in a CNC machine but they hold so much detail in the curves as they twist and turn leaving deep crevice’s in the exterior part of the corbel. The more detail and the bigger a corbel size is then the price will follow suit.
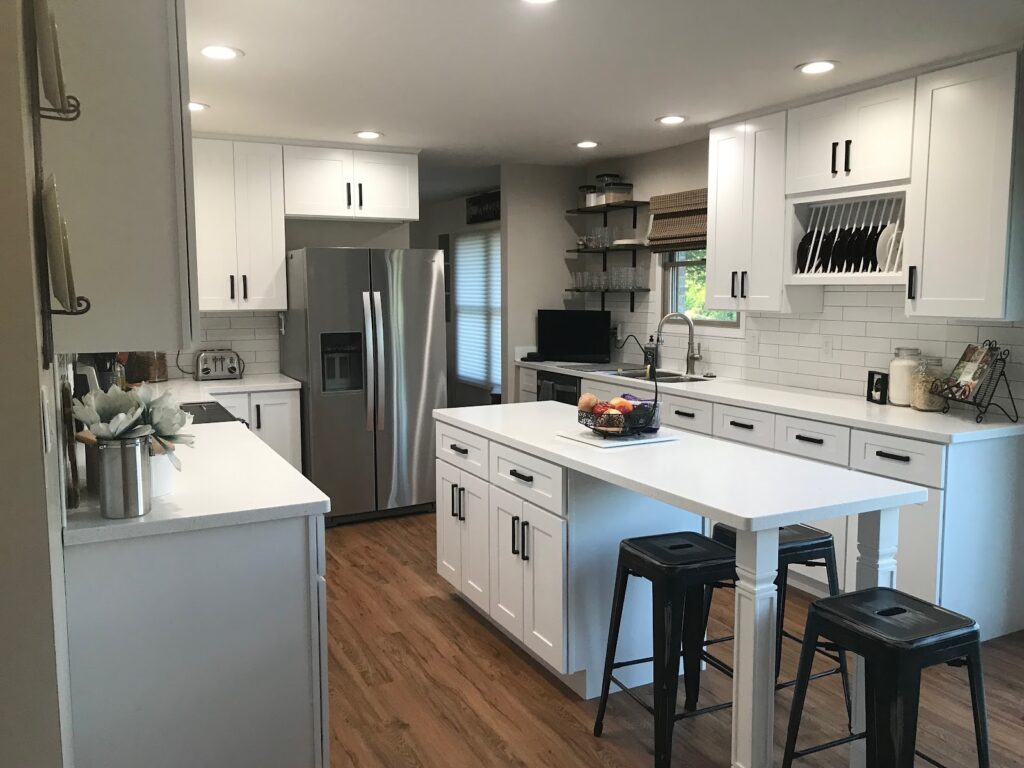
Leg Post Island Makeover
The option to make your island larger is always a good caveat to have because the solutions are limitless. This means your island will need a larger countertop to increase the surface area up top. Depending on how much more depth you are trying to add to your kitchen island, for the most part you can keep the balance by not exceeding the total depth of your kitchen island cabinets, but preferably a quarter of the total depth is a fair increase and it is standard in new homes.
How to add legs to island?
Begin with cutting your side fillers that will extend from the back of your island to the corner of your post legs. Leave a reveal of about a quarter inch on the leg from the filler to match the offset of most international cabinets. The best way to build this together are pocket screws, glue, and nails. Make 2 pocket screws on each side of the fillers and make sure to leave the exposed hole sides facing to the inside or center of island.
Next measure the total width of your island and then to match that size for the island legs total width, go ahead and subtract the total width of both post legs so that you know how long to cut your center filler that will tie into both legs. Once you have it then recess both sides that quarter inch and connect with double pocket screws on each side leaving the holes facing towards the inside of the island.
Depending on how wide your island is you may have to add support in between the island back wall and the longer center post leg filler to add strength. It is also a good idea to cut a support piece for the inner sides of each legs just cut a forty five degree angle on both sides of a small filler to the point that when you slide it into the inner corner the angled sides are touching the fillers around the legs and close enough to the corner of the leg to where you can add a screw from center of filler to corner of inner leg. All this structure will be enough to keep the island legs in place and once the heavy countertop is added then the weight will only help keep everything in place.
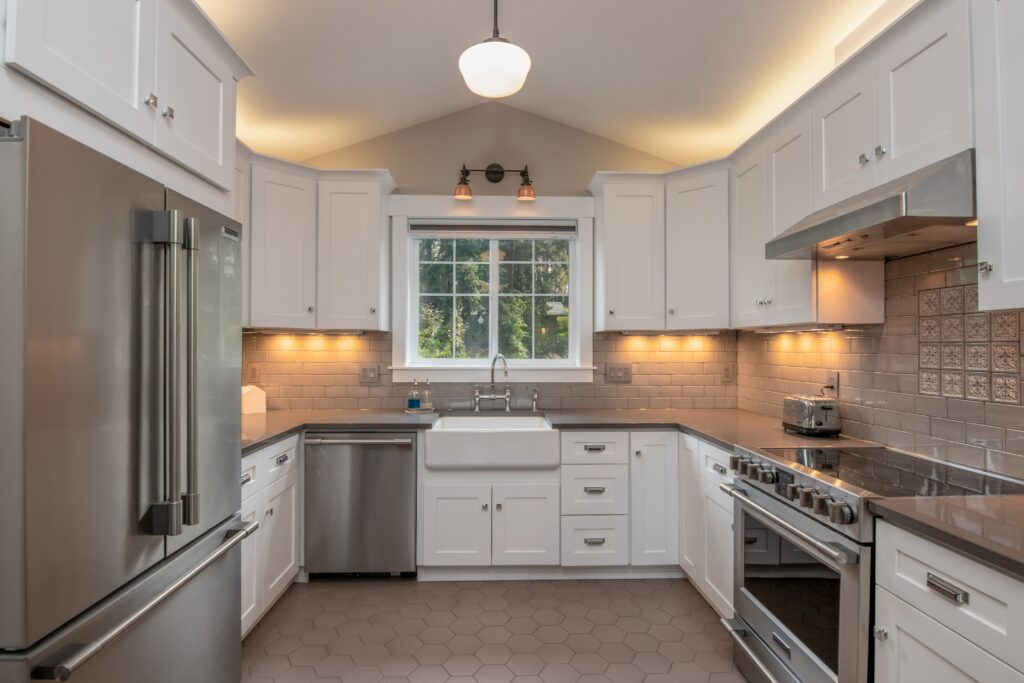
Lighted Cabinets Island Makeover
A good look that many homeowners enjoy is having lights inside the cabinets of the island to give your kitchen a warm glow. The question is:
How do you add lights to kitchen cabinets?
You can do this in 2 methods.
- Battery Powered Led Lights: These lights are mainly stick on or screw on lighting units that you can use for undercabinet lighting or inner cabinet lighting. There are powered by batteries and some are even USB rechargeable LED lights that simply click back into place. You can operate these by buttons on surface or you can get the Bluetooth connection features for your phone control.
- Wired LED Lighting: Most islands already have electricity that is running to them either via an outlet or other wired options. If you are running lights to the cabinets on your island then you should consider having open shelf cabinets meaning no doors or perhaps adding glass doors to appreciate the lighting effects. The Island is made up of several cabinets so installing lights on them is totally possible.
(Disclaimer: Please consult with an electrician prior to doing this kind of work, Stay Safe.)
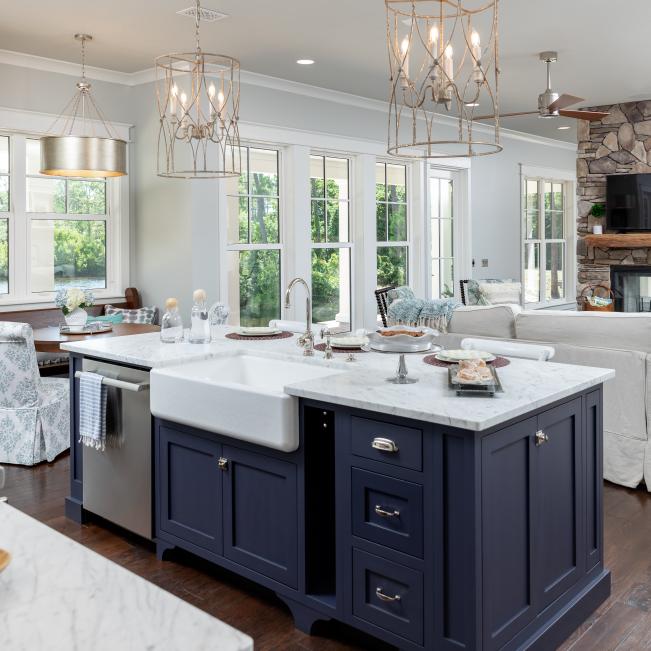
Farmhouse Sink Island Makeover
Are you a fan of the Farmhouse style or design that is really trending right now, if so then you should be aware of the huge gorgeous farmhouse sink that you can add to your kitchen to increase visual aesthetics and functionality. Having that extra space while washing dishes or large pots can really make the difference when using the original farmhouse sink design, They are made for heavy use and can with stand years of abuse because of how tough they are built.
Perhaps you already have plumbing lines running to your kitchen island but if not this is the general idea of what can be done.
How to add plumbing to kitchen island?
This is a 2 sided question because this depends on the what kind of floor your kitchen has and this will also determine how easy or complicated the task might be.
So lets find out what we are working with!
Subfloor
How do you know? If you have a wooden base foundation then you are aware that you have a subfloor underneath because maybe the kitchen of your home is on the second level or you have a basement underneath, the exception to this rule is that older homes sometimes were built with wood subfloor and maybe just have a craw space underneath if the terrain was unlevel at moment of building home.
Having a subfloor will be the best case scenario when seeking to add plumbing to the kitchen island. This means you can simply access your plumbing from underneath you kitchen level and simply redirect the the drain pipes and waterlines from their original position to the center of your island with just drilling holes to the exact location where you want them with out really interfering with the finished flooring in your kitchen.
Concrete Foundation
Most Common Results. If your kitchen is on the first level of your home and you know that there is concrete foundation underneath because of maybe exposed footing edges along the sides of your home then this is a good give away that there is solid concrete underneath your finished flooring. This just means the level of caveats just increased.
Can you do actually run plumbing in concrete foundation? The answer is Yes! You can add plumbing or redirect existing plumbing with a few simple but interesting steps. We assume you would like to move the plumbing from your kitchen wall to an island, and you can do this by mentally preparing of what is about to happen in the following steps.
- Close off water supply
- Remove sink cabinet/countertop
- Clear path to center of island/floor removal
- Uninstall the island and move it temporary
- Start Jack Hammering the concrete from point A to B
- Keep a straight/deep enough line for drain slope
- Run water lines and drain pipes in the trench created.
- Pour concrete with proper support
- Redo the finish floor on your kitchen
- Install island, sink cabinet, and countertops
Sounds easy but this process is long and will require a lot of time and attention, please get it inspected as well.
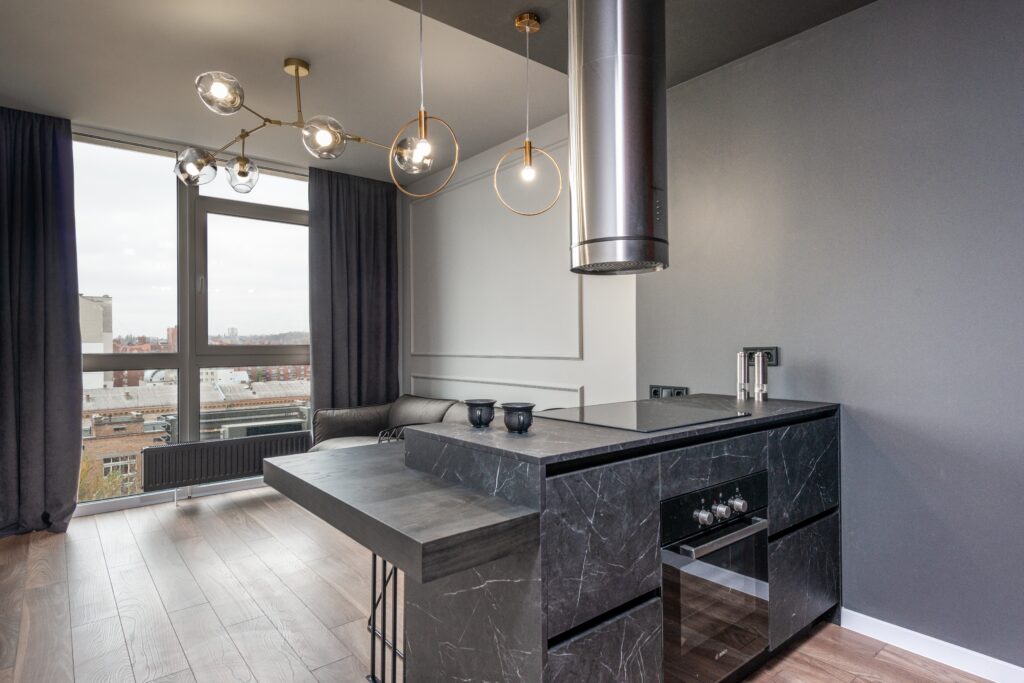
Stove Top Island Makeover
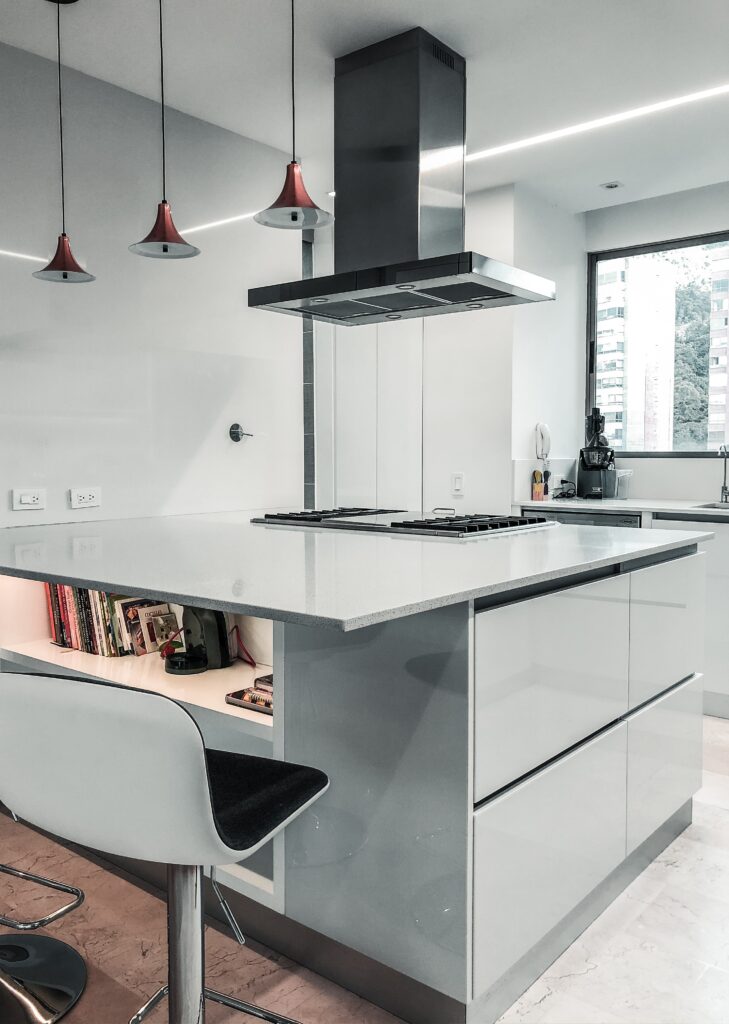
With all the modern new technology we now have amazing products like slim stove tops that fit discretely into any countertop. Perhaps you already have an electrical outlet running to your kitchen island if so then an electric stove top will be an ideal addition to your island. Of course you will need more power and more than likely a bigger fuse added to your electrical panel, but the electrician will take care of that. The best part of these new stove top designs is the flush mount feature that makes it so much easier to clean and keep up the maintenance.
Heads up! Literally.
When adding the stove to your kitchen then keep in mind that you will also need to add proper ventilation to keep the smoke and condensation levels low. This means adding a vent range hood that drops down from your ceiling in towards the center of your island. It might interfere with the open kitchen concept but what a perk to be able to cook at the same time and keep your guests entertained.
Custom Seating Island
Makeover
Do you like to seat around the kitchen island. The traditional bar stools can do the trick and they look nice as well giving a stylish uptown look. That grandeur look comes with a price and that is comfortability.
The solution for extended comfort. Integrating solid bench style seats into the design of your island is like having a couch in your kitchen that blends in with superb style. You can decorate the seats with cushions that match your kitchen and the island countertop can wrap around the top of the bench and or arm rests to make it look like one giant entertainment center. Talk about looking for a focal point for your kitchen.
Conclusion
Thank you for your reading this all the way through we look forward to seeing how your kitchen island makeover turned out. Send us some pictures or post them on the comments below. Also feel free to reach out if you need any assistance. Come and check out our other projects and DIY videos that will help inspire some change in your kitchen life.
We are professional kitchen installers with lots of experience in the residential and commercial fields. Do you admire the cabinetry and kitchen features you see in local restaurants, well now you read about the entire process of how we built those designs. Check out the blogs and see our Youtube channel here.
Cheers!



Pingback: Can you put an island in a 12×12 kitchen? - Modern Carpentry | Wood Projects
Pingback: Is my kitchen too small for an island? - Modern Carpentry | Wood Projects
Pingback: Floating Kitchen Island with Seating - Modern Carpentry | Wood Projects