
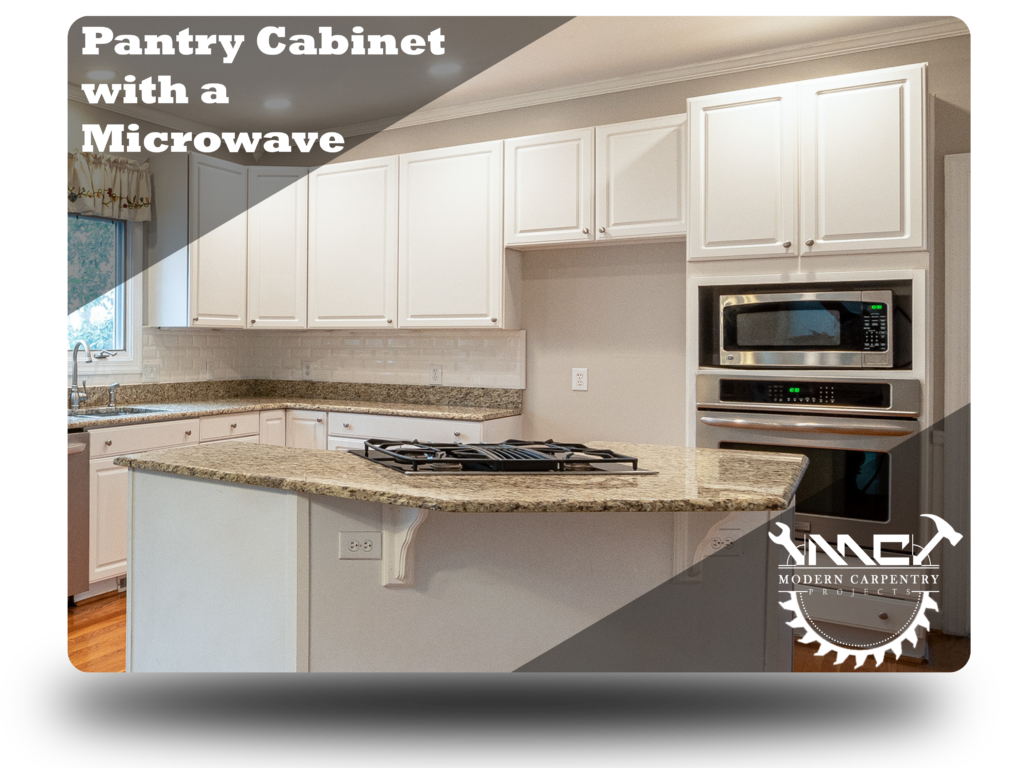
There is something about a well-stocked pantry that just makes you feel in control of your world. Not to mention, it’s a real-life-saver when you need to whip up a quick meal or put together a party dish on short notice. But if your pantry is anything like mine, it’s probably crammed full of boxes, cans, and other less-than-appetizing items. And if you don’t have a lot of counter space, then adding a microwave to the mix can seem downright impossible.
But it doesn’t have to be! With a little planning and some elbow grease, you can easily add a microwave to your pantry cabinet. This guide will walk you through the entire process, from planning and building to adding the finishing touches. So whether you’re short on space or just want a convenient place to store your microwave, this guide will show you how to do it!
What You’ll Need
Before you get started, you’ll need to gather a few supplies. Here’s what you’ll need to build your pantry cabinet with a microwave:
- Plywood (enough to build the cabinet base and shelves): You can find this at your local hardware store.
- Microwave: You’ll need to choose a microwave that fits your space and needs.
- Cabinet doors: These can be purchased or made from scratch.
- Pulls or handles: Choose these based on the style of your kitchen.
- Paint or stain: Choose a color that compliments your kitchen.
- Construction adhesive: This will be used to attach the plywood to the wall.
- Cordless drill: This will make it easier to screw everything together.
- Screws: You’ll need these to attach the cabinet doors.
Tools You’ll Need
In addition to the supplies listed above, you’ll need a few tools to help you build your pantry cabinet. Here’s what you’ll need:
- Tape measure
- Circular saw
- Level
- Paintbrush or roller
- Screwdriver
- Hammer
Step 1: Measure Your Space
The first step is to measure your space and determine how big your pantry cabinet can be. You’ll need to take into account the size of your microwave, as well as the depth of your shelves. Once you have these measurements, you can begin cutting your plywood.
To get perfect measurement, make sure you:
- Measure the width of the space where you’ll be placing your cabinet. This will be the width of your cabinet.
- Measure the height of the space from the floor to where you want your cabinet to sit. This will be the height of your cabinet.
- Measure the depth of your microwave. This will be the depth of your shelves.
- Use a level to make sure your measurements are accurate.
Step 2: Cut the Plywood
Using a circular saw, cut the plywood to the appropriate sizes for your cabinet base and shelves. If you’re not comfortable using a saw, you can have the plywood cut for you at your local hardware store.
To get precise cutting:
- Mark the measurements on the plywood using a pencil: When cutting, make sure you leave enough room for the thickness of your cabinet doors.
- Cut along the lines with a circular saw: Make sure to wear safety goggles when using the saw.
- Use sandpaper to smooth out any rough edges.
Step 3: Assemble the Cabinet Base
Now it’s time to start assembling your cabinet! Begin by attaching the sides of the cabinet base to the bottom piece using construction adhesive and screws. Then, attach the back piece to the sides and bottom.
Once your cabinet base is assembled, you can start attaching the shelves. To do this, simply apply construction adhesive to the shelf supports and attach them to the inside of the cabinet. Then, slide the shelves into place.
Step 4: Attach the Cabinet Doors
The final step in assembling your cabinet is to attach the doors. If you’re using pre-made doors, simply align them with the openings and screw them into place. If you’re making your own doors, you’ll need to measure and cut them to fit before attaching them.
Once the doors are in place, you can add the pulls or handles of your choice.
Step 5: Paint or Stain the Cabinet
The last step is to paint or stain your cabinet. This will give it a finished look and help it match the rest of your kitchen.
To paint or stain your cabinet:
- Apply a coat of primer: This will help the paint or stain adhere to the wood.
- Paint or stain the cabinet: Be sure to follow the directions on the can for best results.
- Let the paint or stain dry: This can take anywhere from a few hours to a few days.
And that’s it! Your pantry cabinet with a microwave is now complete. Enjoy your new kitchen space!
What to Consider Before You Start
Building a pantry cabinet with a microwave is a relatively easy project, but there are a few things you should consider before you start. Here are a few things to keep in mind:
1. The size of your microwave
Make sure you measure the depth of your microwave before you start cutting the plywood for your shelves. This will ensure that your shelves are the right size for your appliance.
Otherwise, you may find that your microwave doesn’t fit properly on the shelves, or that the doors don’t line up correctly. As a result, your cabinet may not look as polished as you’d like.
2. The type of doors you want
Do you want pre-made doors or do you want to make your own? There are benefits to both options. Pre-made doors are usually less expensive and easier to install, but they may not fit as snugly as custom-made doors. On the other hand, custom-made doors will take more time and effort to make, but they’ll fit your cabinet perfectly.
3. The finish you want
When it comes to painting or staining your cabinet, there are endless possibilities. You can choose a color that matches the rest of your kitchen, or go for something bold and unique. Just be sure to choose a paint or stain that is meant for use on wood.
4. The style of your kitchen
Your pantry cabinet with a microwave shelf should match the overall style of your kitchen. If you have a modern kitchen, you may want to choose a sleek and simple cabinet design. If you have a more traditional kitchen, you may want to choose a cabinet with more ornate details.
5. The budget for your project
Building a pantry cabinet with a microwave is an affordable project, but the cost of materials can add up quickly. Be sure to set a budget for your project and stick to it. This will help you stay on track and avoid overspending.
Tips to Keep in Mind While Building Your Cabinet
Building a pantry cabinet with a microwave is a relatively simple project, but there are a few things you should keep in mind while you’re working. Here are some tips to help you build the perfect cabinet:
- Use construction adhesive: This will help your cabinet parts stay together while you’re screwing them into place.
- Use clamps: Clamps will help you keep the cabinet parts in place while you’re working.
- Use a drill: Using a drill will make it easier to attach the cabinet parts together.
- Use a level: A level will help you make sure your cabinet is evenly balanced.
- Follow the directions: Be sure to read and follow the directions for your paint or stain. This will ensure that you get the best results.
What’s Next?
Now that you know how to build a pantry cabinet with a microwave, you may be wondering what’s next. Here are some ideas for what you can do next:
1. Add some storage
If you’re short on storage space in your kitchen, consider adding some shelves to your pantry cabinet. This will give you extra space to store food, dishes, and other kitchen essentials.
For instance, you could add some wire shelves to the inside of your cabinet doors. Or, you could install some shelves on the top of your cabinet.
2. Paint or stain your cabinet
Once your cabinet is built, you may want to paint or stain it. This will give it a finished look and help it match the rest of your kitchen.
When painting or staining, be sure to use a paint or stain that is meant for use on wood. This will ensure that your cabinet looks its best.
3. Add some hardware
If you want, you can add some hardware to your pantry cabinet. This includes things like handles, knobs, and pulls.
Adding hardware is a great way to personalize your cabinet and make it your own. Just be sure to choose hardware that matches the rest of your kitchen.
4. Enjoy your new pantry cabinet!
Now that your cabinet is built, you can enjoy all the benefits it has to offer. You’ll have extra storage space for all your kitchen essentials, and you’ll be able to keep your microwave close at hand. Plus, you’ll love the way your new cabinet looks!
Conclusion
Building a pantry cabinet with a microwave is an affordable project that will help you stay organized and save space in your kitchen. By following these simple tips, you can build a cabinet that’s perfect for your needs. Be sure to choose the right materials, measure accurately, and use construction adhesive to ensure a sturdy finished product. Have fun with this project and enjoy your new pantry cabinet!
Need Help with Pantry Cabinet Installation?
If you need help installing your pantry cabinet, contact Modern Carpentry LLC. We have years of experience installing cabinets in homes throughout the Tri-State area. We’ll work with you to ensure that your cabinet is installed correctly and efficiently. So don’t hesitate to contact us today!
FAQs
Can you put a microwave in a pantry cabinet?
Yes, you can put a microwave in a pantry cabinet, but there are a few things to keep in mind. First, make sure the cabinet is big enough to accommodate the microwave. Second, check to see if the cabinet has ventilation so the heat from the microwave doesn’t build up and cause damage. Finally, make sure the microwave is properly plugged into an electrical outlet.
How do you build a microwave cabinet?
Building a microwave cabinet with storage is relatively simple. Start by measuring the space where the cabinet will go and then cut plywood to those dimensions. Next, attach the plywood to the wall using screws or nails. Then, add any trim or molding you desire. Finally, paint or stain the cabinet to match the rest of your kitchen.
Can you make a countertop microwave into a built-in?
Yes, you can make a countertop microwave into a built-in by following these steps: first, remove the microwave from its current location and unplug it from the electrical outlet. Next, use a drill to create holes in the back of the cabinet where the microwave will go. Then, insert screws into the holes and twist them to secure the microwave in place. Finally, plug the microwave back into the outlet and replace any food that was inside.
How do you install a microwave inside a cabinet?
Installing a microwave inside a cabinet is relatively simple. Start by measuring the space where the cabinet will go and then cut plywood to those dimensions. Next, attach the plywood to the wall using screws or nails. Then, add any trim or molding you desire. Finally, paint or stain the cabinet to match the rest of your kitchen.
What kind of microwave can go in a cabinet?
Most countertop microwaves can be installed in a cabinet. However, there are some built-in microwaves that are specifically designed to be installed in a cabinet. These models typically have vents on the bottom or back so that heat can escape and ventilation isn’t an issue.
How much space do you need around a microwave cabinet?
You will need at least 30 inches of space above the microwave shelf cabinet for proper ventilation. Additionally, you should leave at least 3 inches of space on all sides of the cabinet to ensure proper airflow.
Does a built-in microwave need a vent?
A built-in microwave typically needs a vent to allow heat and steam to escape. Without a vent, the heat and steam could build up and cause damage to the microwave or the surrounding cabinets.
Where should you not put a microwave?
You should not put a microwave in an enclosed space such as a cabinet without ventilation. Additionally, you should not put a microwave near flammable materials such as paper towels or cleaning supplies. Finally, you should not put a microwave above an oven or stovetop where it could be exposed to high temperatures.
How much ventilation does a microwave need?
A microwave needs at least 30 inches of space above it for proper ventilation. Additionally, it should have 3 inches of space on all sides to ensure proper airflow. If the microwave is installed in a cabinet, the cabinet should have vents to allow heat and steam to escape.


